12. Hello TFT LCD World

In our previous post Choosing the right display we looked at a few options to use as our main display. We ended up choosing a 240x320 ILI9341 TFT Screen that is available to buy at a lot of places, like Amazon, AliExpress, PJRC, Ebay, etc. It is driven by a ILI9341 chip that can handle 240x320 resolution, 18-bit color, and uses the SPI (Serial Peripheral Interface) for communications and uses only 4 signal pins, CS, SCLK, MOSI and MISO, which is perfect for interfacing with boards like the Arduino, ESP32 and Teensy, since they all support SPI communications natively.
Most of these displays also come with Touch capabilities from a XPT2046 touch controller, which require an additional library to control and 5 additional pins.

Wiring
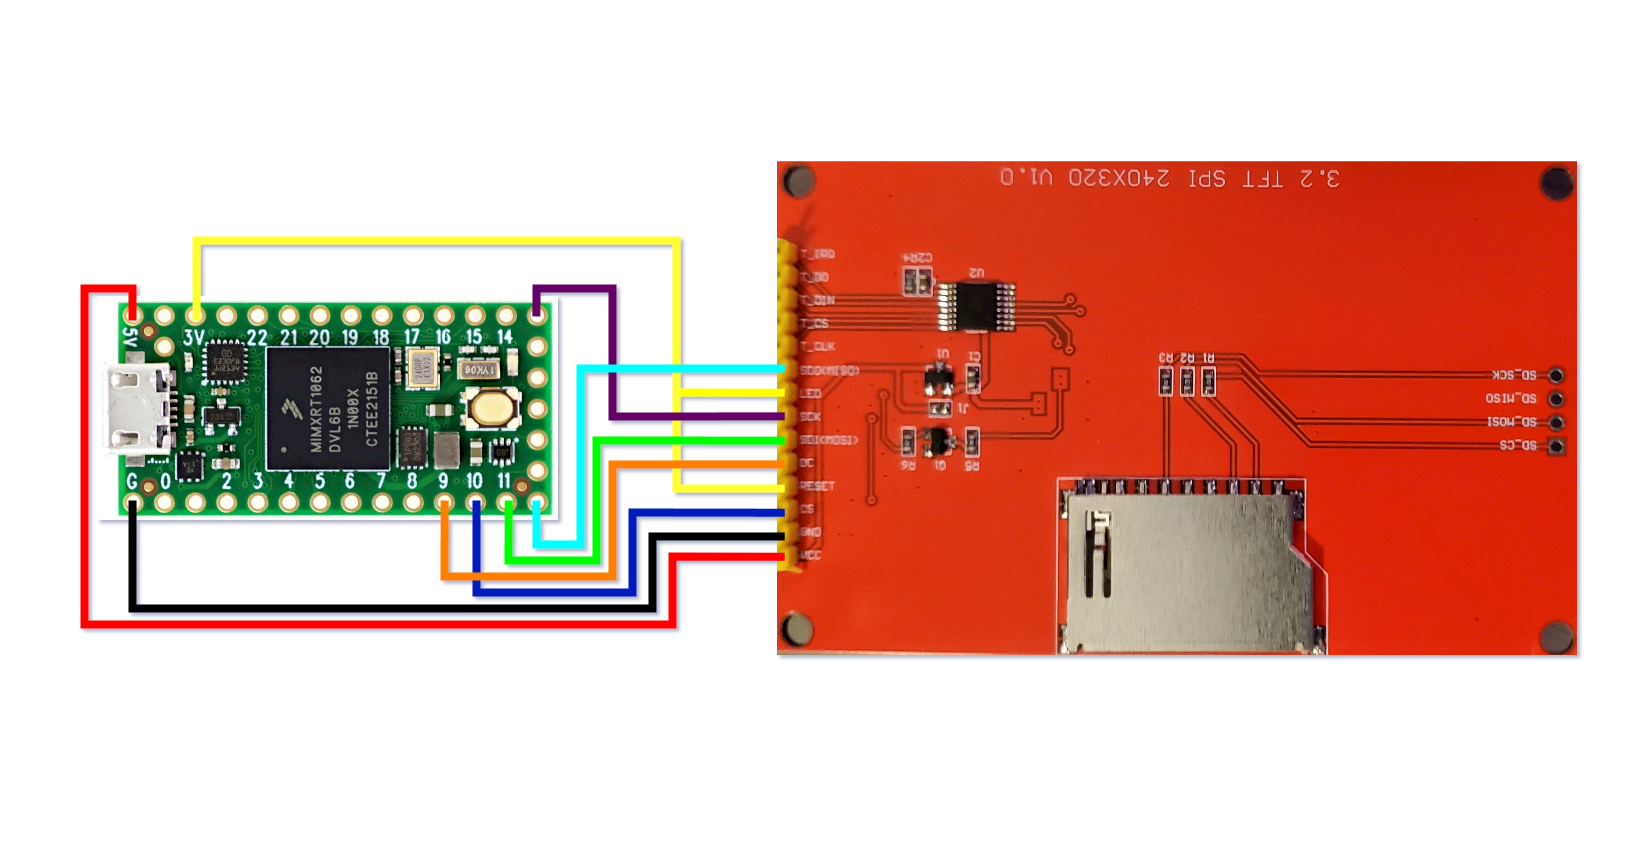
One important fact about these displays. The signal lines can only handle 3.3V, so be careful what you connect them to that could damage your display. 5V should only be used as VCC, and if wiring the LED pin to 5V, put a 100 ohm resistor in place (or just wire to 3.3V)

| TFT Screen PIN | Teensy PIN | Description | Notes |
|---|---|---|---|
| VCC | VIN | Power Supply In | 5V |
| GND | GND | Power Supply Ground | |
| CS | 10 | Chip Select | |
| RESET | 3.3V | LCD Reset | |
| DC | 9 | SPI Data/Command selection | |
| SDI (MOSI) | 11 | Serial data master, out slave in | |
| SCK | 13 | Clock Signal from master | |
| LED | 3.3V or VIN (5V) | Backlight | Use 100ohm resistor if using 5V |
| SDO (MISO) | 12 | Serial data master in, slave out |
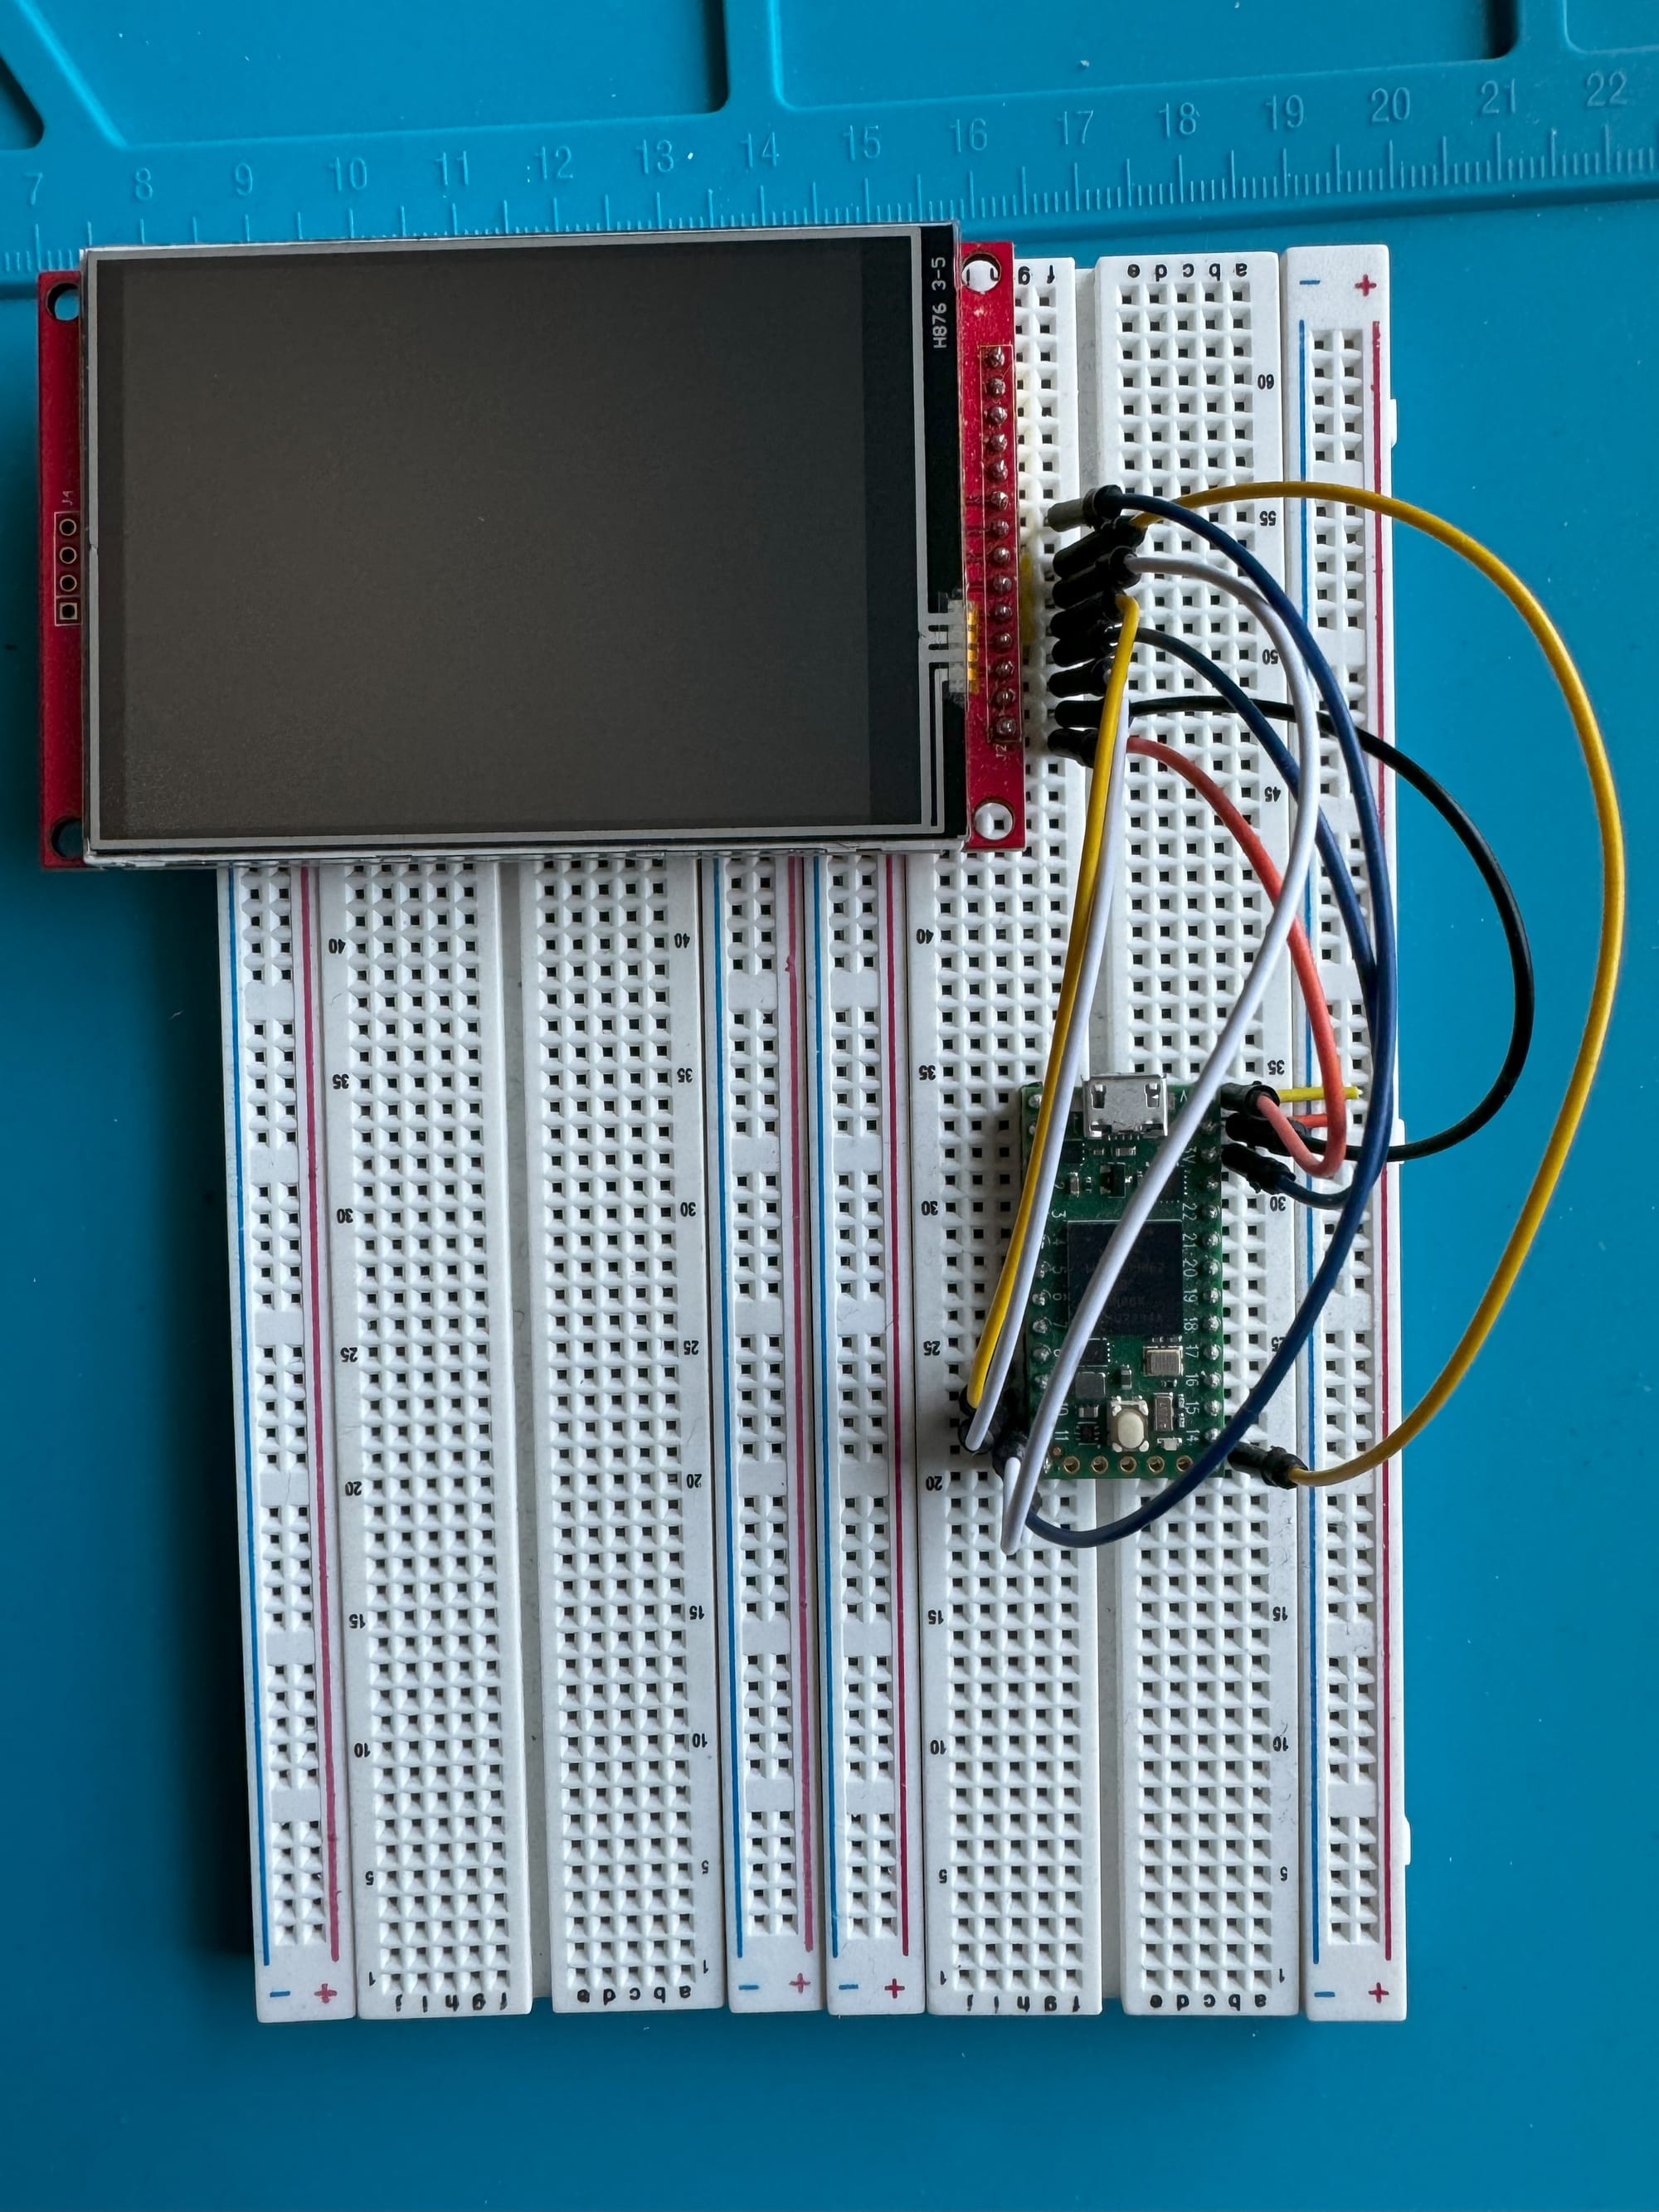
I recommend using a breadboard for development before soldering all the cables without testing. This is how my development setup looks like:

Arduino IDE Setup
The Arduino IDE supports multiple boards besides Arduino. To get Teensy support in the Arduino IDE, open File->Preferences and in the Additional boards manager URLs add the following:
https://www.pjrc.com/teensy/package_teensy_index.jsonShould look like something like this:

Note that this is Arduino IDE 2.x. If you want to, you can do the same in Arduino 1.x, but I recommend using 2.x.
Once that you added the Teensy board manager URL, let's open the Boards Manager and search for teensy. Teensy (for Arduino IDE 2.0.4 or later) should show up. Install the latest version.

Now that our IDE is setup and our Teensy is connected to the computer, lets try out one of the examples. Go to File -> Examples, under Examples for Teensy 4.0 look for ILI9341_t3 and open the graphicstest example:

Select your Teensy in the boards drop down menu and Build and Upload the Sketch. Once finished, and if everything is wired properly, you'll see a message on the screen saying "Waiting for Arduino Serial Monitor...". Open the Serial Monitor in the IDE and watch the magic happen!
While the graphics eye candy show is going, the Teensy will output some stats for nerds to the Serial Monitor window that look like this:

One thing to try out. If you have an Arduino UNO, hook it up to the LCD screen and run the Adafruit ILI9341 graphicstest example sketch so you can compare the numbers. The Teensy is so much faster, which is why I decided to go with this platform.
So how does this work?
At the beginning of the Sketch, we can see the following:
#include "SPI.h"
#include "ILI9341_t3.h"
#include "font_Arial.h"

// For the Adafruit shield, these are the default.
#define TFT_DC  9
#define TFT_CS 10

// Use hardware SPI (on Uno, #13, #12, #11) and the above for CS/DC
ILI9341_t3 tft = ILI9341_t3(TFT_CS, TFT_DC);
These TFT devices have an ILI9341 driver that uses SPI for communications. The ILI9341_t3.h is a Teensy optimized version of the ILI9341.h library made by Adafruit, which works in combination of the Adafruit_GFX.h library for drawing graphics on a screen.
We also define where our Data/Communications and Chip Select pins are connected to and we create an ILI9341_t3 object called tft for drawing.
In the setup() function we see the following:
void setup() {
  tft.begin();
// Note: you can now set the SPI speed to any value
// the default value is 30Mhz, but most ILI9341 displays
// can handle at least 60Mhz and as much as 100Mhz
//  tft.setClock(60000000);
  tft.fillScreen(ILI9341_BLACK);
  tft.setTextColor(ILI9341_YELLOW);
  tft.setTextSize(2);
  tft.println("Waiting for Arduino Serial Monitor...");
We are initializing our tft screen with the begin() function, which takes care of the SPI initialization. Then we use fillscreen() to set the screen to black, we setTextColor() to yellow and setTextSize() to 2, which renders the default font at 10 x 16 pixels per character, instead of the default size of 1 which renders it at 6 x 8 pixels. We can also specify the screen orientation by calling setRotation() with values of 0,1,2,3 for 0, 90, 180 and 270 degrees. Note that the coordinate system is always (0,0) at the top left corner of the screen and depending on the orientation, can be either 240x320 or 320x240 at the bottom left corner of the screen.
To draw text, we first call the setCursor(x,y) to specify where we will begin writing text, and use println() to output text with the last color specified (yellow) and font size (2). All subsequent calls to print() or println() will also use the same color and size unless you change it to something else.
tft.setSize(2);
tft.setColor(ILI9341_RED);
tft.println("This text is RED and size 2");

tft.setSize(3);
tft.setColor(ILI9341_WHITE);
tft.println("This text is WHITE and size 3");
Drawing lines can be done in two ways: you can use drawLine(x1,y1,x2,y2,color) to draw a line from point (x1,y1) to point (x2,y2) with the specified color, or you can use the drawFastHLine(x,y,width,color) and drawFastVLine(x,y,height,color) to draw a horizontal or vertical line starting from point (x,y) and with the specified width or height and color. These two take advantage of ILI9341 commands and are more efficient than using the regular drawLine() to draw horizontal and vertical lines.
The library also functions to either draw an empty shape or fill a solid shape. For example drawCircle(x,y,radius,color) will draw an empty circle with a center at point (x,y) of the specified radius and color, but fillCircle(x,y,radius,color) will draw a solid circle at point (x,y) of the specified radius and filled in its entirety of the specified color. Similar functions are available for triangles and rectangles, with the addition of rectangles have an additional round corner counterparts, for when you might want to draw something like a button.
Performance considerations
A very important thing to know, there is no native logic for "remembering" what the drawn shapes are. These functions are the most basic forms of drawing, and they just draw on top of whatever is already on the screen. If for example you wanted to draw something like the blue sky and the sun, and later want to draw the black night sky and the moon, you first have to fill the entire screen with a blue color using fillScreen() which erases everything, then you would have to use fillCircle() to draw a "sun". Then when you want to draw the night scene, you'll need to call fillScreen() again, this time with black, erasing the entire display, and then would have to call fillCircle() again to draw the "moon". This tends to be slow, especially whenever you call fillScreen(), so keep in mind this and only update the sections of the screen you need to update depending on what you are drawing. Like I mentioned before, there are other ways around this, like using a frame buffer, which I'll talk more about later.
Useful Links
Both Adafruit libraries can be found here:
They also have a really good tutorial on how to draw on these ILI9341 driven devices here, which I suggest you go through for more details on how to draw graphics on the screen using the library.

